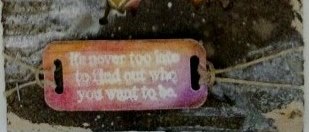
I used corrugated cardboard from a box I had & cut it slightly larger than the tag. They say three's a charm...on my first attempt I had a ridge across the top of the tag & the second try the die cut was off to the side to far & too low. Instead of die cutting the butterflies straight, I placed the cardboard on the die at an angle & was still able to get it through my Big Shot machine. I then peeled some of the paper away from the cardboard, blended walnut stain ink all over it & randomly applied gesso. Then I sprayed it with ground expresso, picket fence & tarnished brass spray stains.
On the 1st tag, I decided to use the mixed media dies which are smaller than the Mixed Media 2 dies used by Tim plus I use #10 tags which are larger than the tags Tim uses. Because of the size difference, when I placed the dies on the edge of the tag on my 1st attempt they didn't show up through the butterflies. Also I wanted the die cuts to only partially show through the butterflies die cuts. So I held the cardboard over the tag so I knew where to position the dies. The dies are held in place with removable masking tape & placed on a precision base plate which helps cut detailed dies then run through my Big Shot.
On the 2nd tag, Tim's instructions said to use paper but I decided on his postale tissue wrap because I like the script. Again the paper would only show through the die cuts so I didn't cover the entire tag. I used multi medium to adhere the tissue wrap to the tag. In this photo I read the instructions wrong & applied the gesso which is in the next step.
Using multi-medium, I adhered the die cut tag over the tag with the tissue wrap. Then I brushed a thin coat of gesso over the die cut area & quickly wiped some gesso away with a baby wipe. Because of my mistake I have 2 coats of gesso so the tissue paper does show through as well on the finished tag. Maybe it would have been better to use paper but the tissue wrap took my eye.
Now for the fun part! I used Tim's new crayons from the set of primary colors because that's the only set I have right now. They're a hot product & I can see why. When I first tested the crayons, I used a piece of cardstock & wasn't impressed because they didn't blend very well. The key is gesso! The gesso seals the surface & makes it so easy to blend the colors ....I've changed my mind & I'm sold! When I blended the colors it left white around the die cut which made the die cuts stand out more. Again, so I knew where to color I placed the cardboard over the tag. This is where I was so excited to see the finished tag that I stopped taking photos...LOL! The next step was to adhere the cardboard to the tag using multi medium. Once dry, I used a paper distresser to rough up the edges & blended walnut stain ink over the edges.
Now to start adding the finishing touches. Gold foil was randomly added to the edges by rubbing a glue stick to the areas I wanted to accent then laying the foil, gold side up, over the glue & rub gently. Leave on for about 5 mins then peel off & there's your accent! It looks much better in person.
I did feel I needed some metal so I colored a typed token, "dream", with the purple crayon. I'm not sure the color shows up very well & feel I should have used a lighter color. After punching a hole through the cardboard, I tied a strip of burlap at the top then placed the token on using a loop pin.
Well that's my version of Tim's tag! Hope you enjoyed my variations (& learned from my mistakes...LOL)! TFL!!


Your tag is really pretty - I like your idea of using the tissue wrap. It took me 3 attempts with my March tag, and on the 3rd version I used a darker paper for my background. Still doesn't show that great now matter how hard you try to put down a thin layer of gesso and then dab some off! Oh well, but great job on your tag :-)
ReplyDelete