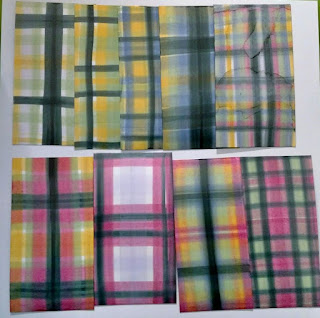
I had limited colors of alcohol inks but it was amazing at the combinations I came up with. I will say this is addicting & I kept doing "just one more". My Cranberry came out pink & I just couldn't get it to be a darker.
 These are my practice pieces & are a little smaller than a #8 tag. I tried dropping blending solution on the top right piece so there would be a place to stamp. It ran a little & I probably should have used another drop or two to make it a little lighter.
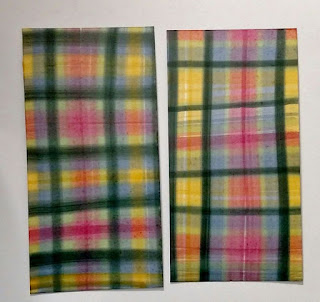
These two are about the size of a #10 tag. Since it was a larger surface I had trouble holding it straight at first.
Making these diagonal samples were really fun but I need a little more practice so they're straight.
You do want to use less Black Soot, a little does go a long way. When putting the ink on the felt, it will wick some so be careful or you'll have a very wide stripe.
The 2 hardest things are keeping the blending tool straight while pulling it across the CS & reversing the direction. 1.) I think I may try to adhere the glossy CS to something then use a straight edge to guide the blending tool. 2.) Tim's direction said to turn the tool around AND reverse the direction. Unless I read it wrong I thought it meant to pull the tool towards me then push it away from me, in the other direction. I just couldn't do the reverse motion but I think it came out good by turning the tool & only pulling it down the CS. Of course I probably could have turned the CS too!
Although I used a craft mat, I also placed a piece of scrap paper under the CS. I found this helps keep my craft mat from staining. The blending solution does take it off but if there are any cracks or cuts it's hard to get the alcohol ink off.
SUPPLIES: Tags - Ranger #8 Kraft, Ranger Inkssentials #10 Manilla; Tim Holtz Adirondack Alcohol Ink - Sunshine yellow, Denim Blue, Meadow, Cranberry, Pitch Black, ; Blending Solution; Ink - Ranger Archival Jet Black, Tim Holtz Stormy Sky, Tim Holtz Frayed Burlap; Tim Holtz Stampers Anonymous Stamps - Reindeer Flight, Classics #1 Classics #3, Classics #4, Classics #16, Flurry & Pine Background; Misc - Ranger Inkssentials Glossy Card Stock, Tim Holtz Adirondack Blending Felt, Ranger Ink Blending Tool Handle, Idea-ology Mirrored Stars, Idea-ology Pinecones, Loop Pins, Idea-ology Crinkle Ribbon, Scor-Pal Scor-Tape 1/2", Ranger Glossy Accents, Tonic Paper Distresser, Ranger Non-Stick Craft Sheet.


I warned ypu that this is addictive ;-). They look amazing ♡♡♡♡♡
ReplyDeleteThank you & yes, you did warn me!!
Delete