Many years ago, my sister (-in-law), Judy, Retired2stamp, invited me to a Stampin' Up Party. I was drawn to the 6X6 recipe card swap our local group was doing and had wanted to scrapbook too. I wasn't really interested in card making because I had witnessed my brother (in-law) Ed fold up a handmade card and put it in his pocket. I almost fainted and I didn't even make the card. But after a few parties, I was hooked and now make more cards than I had ever thought I would. My most recent passions are ATCs, tags & altered art. As you look through my blog I hope you can see how I've grown in my crafting ability!
Showing posts with label Altered Art. Show all posts

Tuesday, December 17, 2019

Sea Turtle Candle

For Christmas this year our stamping group decided to have a Secret Santa gift exchange.  We were to write down a few suggestions or hints to help the Secret Santa select our gift.  I drew my SIL Pam & the only hint she gave was she liked the color green.   I was lucky to know that she recently purchased a painting with a sea turtle for her living room.  I had stamped on a candle many years ago but recently discovered people were using battery operated candles.  After watching several YouTube videos, I decided to make one for her.

Any brand of battery operated candle can be used, it just needs to have a waxy surface so it will slightly melt when heated.  If there are batteries in the candle they should be removed before heating.

White tissue paper was cut to fit the candle then  the turtle from Designs by Ryn Sea Creatures 1 was stamped in Memento Cocoa on the dull side.  A paper mask for the turtle was placed on the tissue paper then several of the sea plants were stamped in Memento Potter's Clay & Bamboo Leaves.  The turtle was colored using Copic YG61, YG63 &  E44 then E21 for the sand at the bottom.

The tissue paper was torn, leaving an edge around the image then centered on the candle with the shiny side against the candle.  A piece of wax paper was cut wide enough to cover the image & long enough go around the candle with some left in the back to hold onto.  The wax paper was placed over the stamped image smoothly & held tight.  A heat tool was used on the image, leaving it just long enough to see the image change appearance. The wax paper was carefully removed, making sure the image was melted to the candle.  If necessary it can be heated a little more.  Using a finger, the tissue paper cam be smoothed out but be careful, it's may still be hot.  If the candle is heated to long it may become bumpy.

I tied a piece of twine around the bottom to finish it off. 

I was happy how it turned out for my first try!  TFL!

Friday, December 1, 2017

Advent Calendar

It's finally done!  I  made this for my grandson but it will stay with me until he's an adult with a family of his own.  I started the KaiserCraft advent calendar in October 2016 in class at The Craft Shack.  I love the distressed look so I decided to use paper from Tim Holtz Yuletide 8x8 paper pack.  Although it was time consuming, the best part was choosing the papers & adding all the embellishments.  I finished the drawers & had most of the inside scene finished then I hit a wall...literally.  The wall of the "living room" needed something & I couldn't decide so I put it away & kept looking & thinking.  Then I found it!!

* * * * * * * * * * * * * *

ASSEMBLING:
Unfortunately I didn't take photos as I assembled the frame & boxes.  The frame is MDF &  painted white before assembling.  You need to be careful not to paint the tabs.  It fits together so tight I didn't have to glue it together & paint on the tabs would have made the fit impossible.  Also it's easier to put the paper in the center before assembling the frame.   I used glossy accents to glue the drawers together, holding with a rubber band until dry then painted them white inside & out.  There are several good YouTube videos available on how to assemble them & I would suggest watching a couple if you're going to put one of these together.

* * * * * * * * * * * * * *

FRAME:
Strips of paper from Tim Holt Idea-olgy Yuletide 8x8 paper were adhered around the sides of the frame with Matte Mod Podge.  I got paint on the back so I covered it with a red paper from my stash & added things from Tim's Festive Ephemera Pack, Yuletide paper pack. & a piece stamped with Doodle Greetings #2.  After all the paper was on I went over it with frayed burlap distress ink the gave it another coat of Mod Podge to make sure the paper was sealed.


* * * * * * * * * * * * * *
DRAWERS:
After cutting strips of various papers from Tim's Yuletide, they were wrapped around the drawer & creased so I'd know where to bone fold for a crisp edge.  I held the paper in place & with a pencil drew a line where the half circle was to be cut with a circle punch.  This is where the drawer will be pulled out.
The paper was adhered to the drawers with Mod Podge.  Once it was dry, frayed burlap distress ink was applied to the edges of the paper & the bottom of the drawers with a mini ink blending tool.  I then went over the entire drawer again the the mod podge to seal it.

Below are the drawers before adding the embellishments.  If you notice originally there was another paper in the middle but decided I wanted to go another direction so I changed it to a paper that has a small dot for the appearance of "wallpaper".

* * * * * * * * * * * * * *

DRAWER EMBELLISHMENTS:
Now the fun part!  I started by numbering the drawers with  KaiserCraft Metallic Gold Number Stickers distressed with mushroom alcohol ink & adhered using glossy accents.  In the beginning I was going to have the drawers in sequential order so I made sure I mixed the papers up.  But in the end I mixed the numbers up so you'd have to search for them.  That took a little time to figure out where to put them so the papers were different!  Drawer #25 doesn't have a slot so I make a lid & added a ribbon to make it look like a gift then attached it with glossy accents.  I listed the embellishments I used at the bottom of the page & most were put on with a crop-a-dile-hole-punch or glossy accent.  I wish I could have used all Tim Holtz embellishments but I just didn't have enough but did have some other cute things in my stash.  Some were painted or inked if they were shinny.  I even added a little gold foil with a glue stick to a few.

* * * * * * * * * * * * * *

CENTER:
I started with the tin ceiling made from mirrored sheets, embossed with Tim's Damask EF & inked with black soot ink.  I can't get a good photo of the "hardwood" floor & I'm not sure if the paper is Tim's or something I had in my stash.

The "wainscoting" paper is from Tim's Yuletide with Tim's Yuletide Design Tape used as a border. The Christmas tree is the large tree from Woodlands Trees and Wreath Set sprayed with Peeled Paint Stain. While that was drying, I colored pearls with Adirondack alcohol inks - mushroom, aqua, cranberry, purple twilight, sunshine yellow in small cups. By applying mushroom ink first it tones down the bright colors & gives them a vintage look (learned that from Tim). Gold cord was wrapped around the tree then the dyed pearls were added with glossy accents. The toys & gifts under the tree were from my Department 56 village days. The night scene behind the white CS Memory Box Madison Window is inked with Chipped Sapphire then Santa & his reindeer from SU Holiday Home & the trees tops from Tim's Reindeer Flight were stamped in black Archival Ink.


The SU Festive Fireplace was stamped, embossed with white & inked with Fired Brick then die cut & folded to make it 3D.  The mantel & stockings were from the same set, embossed & colored with several of Tim's markers.  The clock was placed on the wall then the swag from Tim's Mini Holiday Greens in his Kraft Core paper was sanded & added above the mantel.  I also added a few tiny red jewels I had in my stash.  The salvaged doll was painted with black soot (shoes), antique linen (skin), fired brick (nightgown) & vintage photo (hair).  She is standing with her "blanket" which is a piece of crinkle ribbon dyed with tumbled glass.  She' was placed in front of the fireplace amazed Santa had been there! 

The pictures on the wall were vintage images, resized to fit into 3 of the Melissa Frances Resin Frames.  I inked with frayed burlap then added lossy accent over the photos so it looked like glass.

All this was done last winter but as I said it needed something....then I found the Tim Holtz Holly, Beaded, Snowflake Garland Strip Die!  A holly swag was cut from Tim's Kraft Core paper in green & red then sanded...just what it needed!!  I also used a couple of the extra bows on the swag & window.

I probably missed something but if you've read this far it probably doesn't really matter because your head is spinning!

Thanks for looking at my project!


DRAWER EMBELLISHMENTS:
Tim Holt Idea-ology - Christmas typed tokens, mirrored stars, mini fasteners brads, yuletide fasteners, star fasteners, antique nickel arrow, hex fasteners, nailheads; long fasteners, jingle brads, ice skates, pine cones, ring fasteners, frozen snowflakes alpha parts, snowflakes; Ranger - vintage shiny gold transfer foil sheets, mini collage glue stick; KaiserCraft - Metallic Gold Number Sticker Sheet, wooden flourish joy pack; Stampin' Up - Christmas trinkets, mini jingle bells, enamel dots ; Memory Makers - birthday charms; Eyelet Outlet - stocking brads, red Christmas hat brads; Unknown - button brads, lock keys on ring, candy cane charm, mittens, snowflake, jewels, clock charm, swirly clip.

Sunday, November 12, 2017

Craft Fund Shadow Box

This was something I made for the gift exchange at our recent stamping event.  Its a shadow box to save money in for future craft supplies.      

I started with a white shadowbox that holds a 5 X 7 photo.  My hubby used a Dremel tool to cut a slot in the top of the frame big enough to drop folded bills or coins through.  I painted the inside of the slot with DecoArt Americana Snow White Paint. 

After cleaning the acrylic pane with alcohol, I stamped "craft fund" on the outside using Sweet 'n Sassy's Rebecca Script Alpha Stamp Set in Tsukineko StazOn Jet Black Ink.  These are clear lower case letters which are designed to be stamped individually but easily lined up & overlapped to look like cursive.  If you're interested in making one, I've included a few tips at the end of this post. 

For the inside, I stamped SU's Totally Tess holding her craft bag in Memento Black Tuxedo Black Ink then colored the images with Copic.  There was too much blank area but I didn't want a lot of images so I stamped a border from SU's Chalk Lines in Elegant Eggplant & random speckles from SU's Gorgeous Grunge in SU Blushing Bride.  This was mounted on the frame backer with 1" Scor-Tape.  The frame had started to crack at one of the corners so I used Tape Ruban Washi Tape all the way around the frame which is pictured above. 


Just a couple of stamping tips:

1)  I started with "fund", stamping the "d" first.  I used a lined acrylic block that fit down into the front of the frame.  This allowed me to use the frame of the shadow box similar to a stamp platform/Misti.  The "d" was positioned on the acrylic pane then the block was gently placed onto the stamp so it was in the lower right corner.  I then continued stamping the other letters always placing the block in the lower right corner.  I was even able to re-stamp the letter when it wasn't solid.

2}  Next I stamped "craft" starting with the "c".  Before stamping, the letters were placed on the acrylic pane to make sure they didn't over lap onto "fund" & to get a general idea where it should start.  Then a rectangle mask was cut from from scrap paper to mask "fund" (make sure it's cut straight). By bumping the mask into the lower right corner it acts as a guild.  I then placed the "c" on the acrylic pane & gently placed the block on the stamp, making sure the left side of the block was bumped against the left side of the frame.  It's also helpful to have the block's horizontal line across the top of the mask.  You may want to draw a line, trim the mask or move your letters up/down a little but be careful not to go down to far.   
3.  Make sure your stamping on the opposite end of the slot (don't ask why I mentioned this).

4.  If you make a mistake or don't like what how it turns out, rubbing alcohol can be used to remove the ink (again, don't ask me why I mentioned this).  The rubbing alcohol will even take ink off the frame.

Hope you enjoyed my project & thanks for visiting my blog!  

Thursday, April 6, 2017

Eggstravaganza

Got together with my peeps at The Craft Shack last week to make alcohol ink Easter eggs.  We followed Tim Holtz's instructions to make these lovelies!


All you need are various colors of alcohol inks, alcohol ink mixatives a blending tool, alcohol ink blending felt & white plastic eggs!  You might want blending solution too just in case you want to change the color on the eggs or need a little clean up.

So simple just put the 1 or more inks & a mixative on your felt, tap, tap, tap on the egg (do half of the egg at a time), dry, add 1 or 2 of those inks that you want to stand out to the felt, swipe to show a little white on the egg then tap, tap, tap again & dry.  Voila!


Sunday, November 6, 2016

Noel Wall Hanging

This is a wall hanging I made for a gift swap I was in yesterday at our SCS Event.  The gift was to be something related to stamping & of course handmade is always the best.  We had so many great gifts & played a cute Christmas left/right game for the swap.

I started with 4X4 pieces of 4 different patterns from Tim Holtz Idea-olgy Yuletide 8x8-paper pack & adhered them to a 4X4 coaster using Tombow Liquid Glue.  Once dry, I rounded the corners of the paper then distressed the edges with frayed burlap ink.

To make the holes, I measured using Tim Holtz ruler (the best thing since sliced bread) & punched with the bigger side on my crop-a-dile.

The capital letters are cut in SU Cherry Cobbler & Forrest Moss using the Cricut Winter Woodlands Cartridge & popped up with 3d foam squares.

I used items from Tim Holtz's idea-ology to embellish - a lot of pieces from a pack of festive ephemera, a typed Christmas token with a hex fastener, a sticker from occasions small talk, a jingle brad, mirrored stars, frozen snowflakes & snowflakes from gilded holidays remnant rubs.

It's finished with olive green ribbon with a bow tied at the top.

This was a fun easy project & I know I'll be making more of them.


Wednesday, April 27, 2016

Tim Holtz Workshop Project

A few weeks ago I was lucky enough to be invited by my BFF, Lisa Brown to attend the Collins Group Annual Trade Show.  It was the first time we attended  the 5 day event which was packed with workshops with many of the top vendors.  I have to say my favorite is Tim Holtz!  He's such an awesome teacher...he makes everyone feel so relaxed with his humorous style plus he has wonderful projects that are done when you leave class! The only drawback was we couldn't attend the class together but at least we both had a great experience!!

We put a framed collage together using different techniques & elements.  We were able to chose a photo from Found Relatives, different pieces of ephemera & make a word from the letterpress letters.

I chose the 2 girls (of course they represent Lisa & me.) & decided on the word "create" since that's what we do at The Craft Shack!

The icing on the cake was all the goodies we came home with!


Tim always has time for photos with his fans!!  Mario was busy so I didn't get a photo with him this time.


Tim also autographed my Craft Shack apron!  I attended other cool workshops with Dina Wakley, Dyan Reaveley & Ken Oliver who also signed it.  PLUS I got Mario's signature at the make & take!


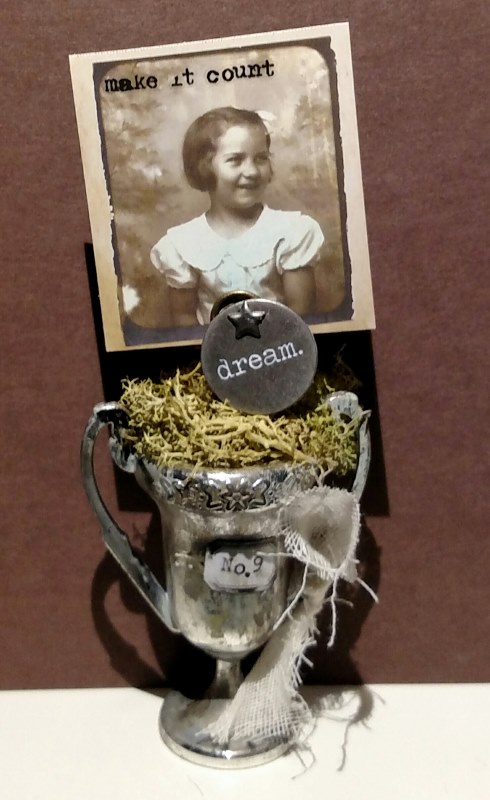
This was Tim's make 'n take we did Friday night! Very neat project that could be used to hold a place card for a dinner or wedding.

TFL!

Wednesday, October 28, 2015

Vintage Holiday Frame


At first, I had a hard time making altered art projects but now I really enjoying them.  This was an unfinished photo frame which, except for a few items from my stash, I filled with Tim Holtz items.  I painted it white then randomly sanded & rubbed Frayed Burlap ink over the white for a distressed look.  All the papers in the background are from Tim's 8X8 Yuletide paper stash.  The back comes off the frame so I cut the paper a little bigger & used liquid adhesive to place the paper on the back of the frame before gluing the back on using glossy accents. 


In the left frame I used a paper that reminded me of old wallpaper.  I thought the "believe" flash card was perfect for this Found Relative photo of a young boy sitting on Santa's lap. The Poinsettia at the top corner is from a pack of Festive Ephmera.


The paper in the top frame has holly berries with leaves.  I wrapped the pine twine twice to make a wreath then wrapped it with thin silver ribbon & distressed a token then hung it with jump rings.  The berries are metallic brads.

The bottom frame has a plain paper with dots & a "box of Christmas lights" Ephnera.  I found the acrylic Christmas lights in my stash so I strung them on floral wire & hung them with screw head brads after I removed the "tails".


This section was the most difficult but I had the fun doing it.  I removed the "tree trunk" then carefully cut one side of the tree off so the back would lay flat against the frame.  It's colored with Peeled Paint Spray Stain (I suggest using gloves & laying it on a lot of paper towels). After the stain dried, I wrapped the tree with silver tinsel twine & used dots of hot glue to hold it in place.  I also hot glued the tree to the frame.  The ornaments are my favorite! First dye the pearls with mushroom alcohol ink which will help tone down the bright colors for a vintage look.  After they dried, I put a few drops of Aqua alcohol ink in a small paper cup, dropped in 3 or 4 pearls & stirred.  Once I got the color I wanted & they were almost dry I put them on a paper towel.  Repeat with Purple Twilight, Cranberry & Sunshine Yellow.  After they dried, I carefully used hot glue to place them on the tree. 


The last section was pretty easy. I used Iced Spruce Paint on the top of the Letterpress & glued them on using glossy accents.  

At the bottom I used a little ephmera sign about not opening presents so why not put a present next to it.  It's from my stash but they would be so easy to make!

I used glossy accents to adhered the 25 ephmera to a fragment & attached a sliver brad so it looks like its hanging on the frame.

Thanks for looking!

Supplies:  KaiserCraft Six Frame Photo Display, Decoart Americana Acrylic Snow White Paint, Tim Holtz Idea-ology Yuletide 8x8 Paper, Tim Holtz Idea-ology Found Relatives Occasions, Tim Holtz Idea-ology Christmastime Flash Cards, Tim Holtz Idea-ology Jump Rings, Tim Holtz Idea-ology Woodlands Trees and Wreath, Tim Holtz Ranger Spray Stain Peeled Paint, Tim Holtz Idea-ology - Festive Ephemera Pack, Tim Holtz Idea-ology Holiday Letterpress,  Tim Holtz Ranger Distress Paint Peeled Paint, Tim Holtz Idea-ology Pine Twine, Tim Holtz Ranger Frayed Burlap Ink Pad, Tim Holtz Idea-ology Typed Tokens Christmas, Tim Holtz Idea-ology Mirrors Stars, Tim Holtz Idea-ology Tinsel Twine. Darice Craft Designer Pearls, Ranger Glossy Accents, Tim Holtz Adirondack Alcohol Ink Mushroom, Cranberry, Sunshine Yellow, Purple Twillight, Aqua. Tim Holtz Idea-ology Sanding Grip.  From my stash-silver ribbon, red metallic brads, Christmas lights, floral wire, Screw head brads